This post may contain affiliate links. Please read our policy page.
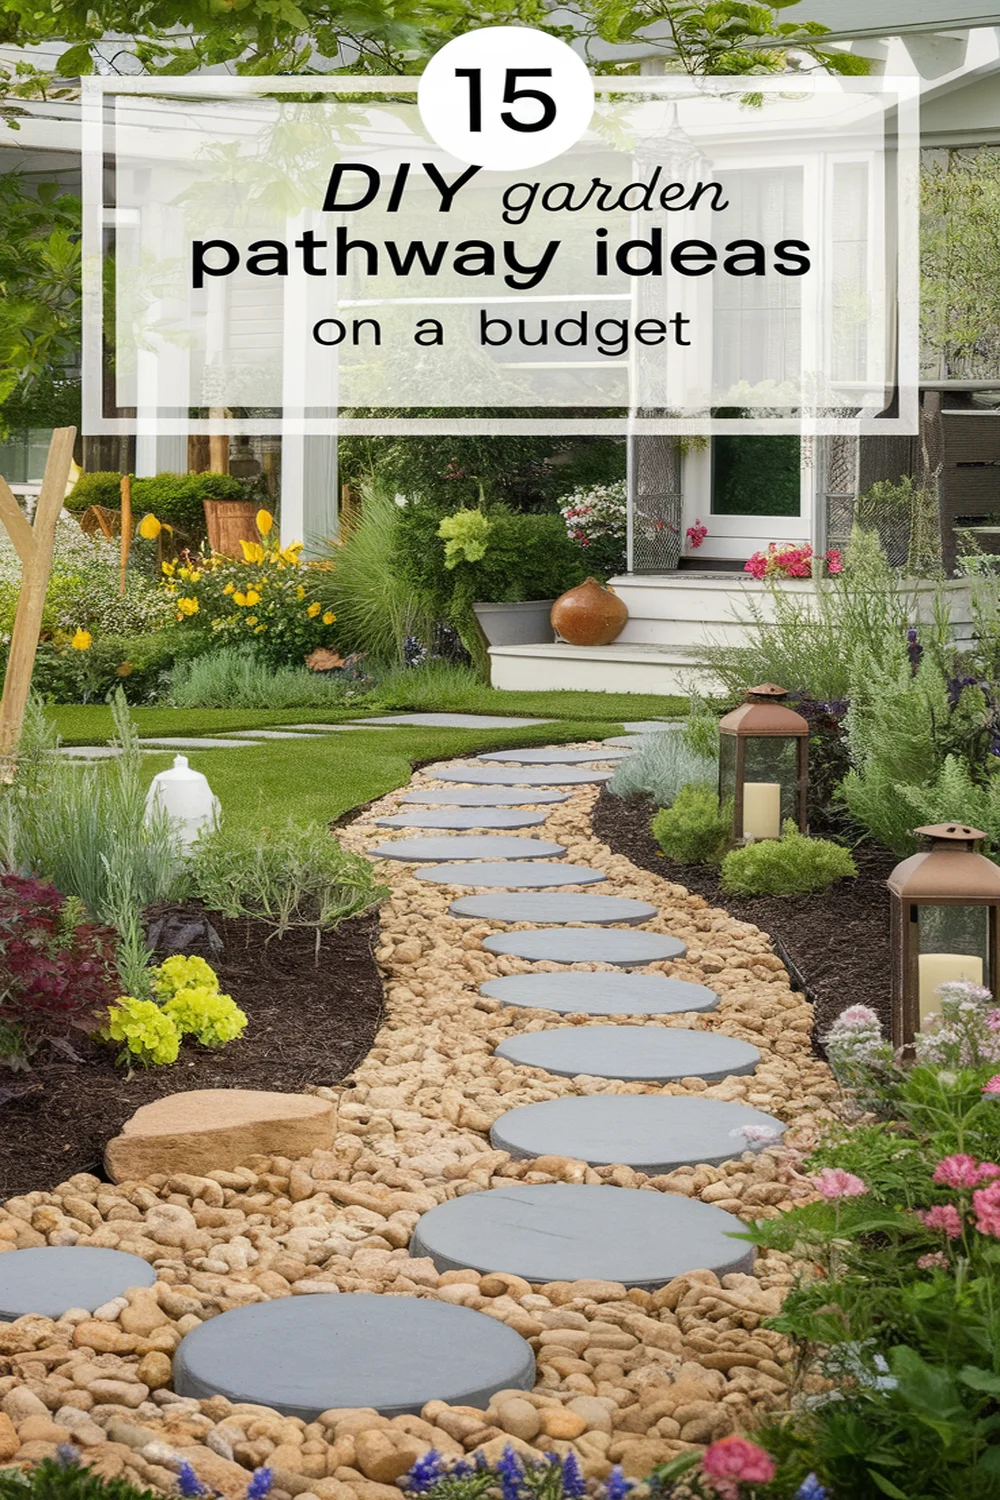
You can create stunning garden pathways on a budget with a mix of DIY ideas. Try gravel pathways for easy installation or use recycled wood for a rustic touch. Stepping stones and brick designs add charm, while mulch trails suppress weeds effectively. Don’t forget to enhance your paths with rope borders or vibrant painted designs. Need more inspiration? There’s a whole world of creative possibilities waiting for you to explore!
Gravel Pathways
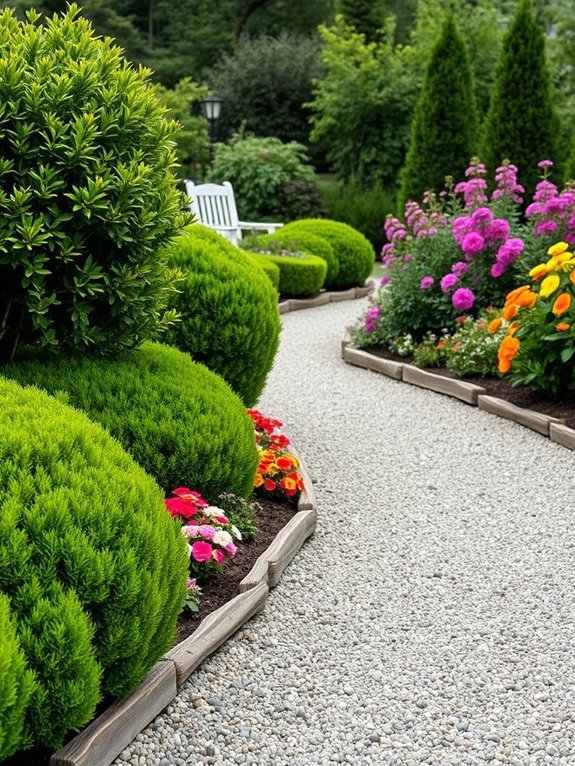
If you’re looking for an affordable and versatile solution for your garden pathway, gravel pathways might just be the perfect choice. They’re easy to install, requiring minimal tools and materials. You can choose from various colors and sizes to match your landscaping style. Start by marking the area where you want the path to go, and then remove any grass or weeds.
Next, lay down a weed barrier to prevent unwanted growth. Pour gravel evenly on top, leveling it out as you go. This type of pathway not only allows for good drainage but also adds a rustic charm to your garden. Plus, it’s simple to maintain; just occasionally add more gravel to keep it looking fresh. Enjoy your new garden path!
Recycled Wood Paths

Transforming your garden with recycled wood paths not only enhances its beauty but also champions sustainability. You can use reclaimed wood planks, pallets, or even tree stumps for a rustic touch. Start by planning the layout—consider curves for a natural feel. For a stable base, dig out some soil where you’ll place the wood. Make sure the ground is level to prevent wobbling. If you want to add décor, try placing small plants or pebbles along the edges for an extra pop. Remember to treat the wood with a weatherproof sealant to prolong its life. With a little creativity and effort, you’ll create a charming, eco-friendly pathway that invites visitors and encourages you to explore your garden!
Stepping Stone Walkways
Stepping stone walkways offer a versatile and visually appealing way to navigate your garden while adding a touch of personality. They’re easy to install and can be customized to fit your style. Consider using different materials like concrete, natural stone, or even recycled options for a unique look. Here’s a quick guide on common design choices:
| Material | Cost Range | Style |
|---|---|---|
| Natural Stone | $2-$10/stone | Rustic and organic |
| Concrete Pavers | $1-$5/paver | Modern and sleek |
| Recycled Materials | $0-$3/item | Eco-friendly and creative |
| Decorative Tiles | $3-$15/tile | Artistic and vibrant |
Experiment with spacing and patterns to create a pathway that complements your garden’s overall look. Enjoy the process!
Recommended Items
Get ready to enhance your garden with these budget-friendly products and tools!
Brick and Paver Designs

When it comes to enhancing your garden pathway, brick and paver designs provide both durability and charm. These materials come in various shapes, sizes, and colors, allowing you to create a personalized look that complements your garden. Start by deciding on a layout—herringbone, running bond, or circular patterns can all add unique flair.
For installation, prepare a stable foundation by leveling the ground and adding a gravel base. Then, place your bricks or pavers closely together for a clean finish. Don’t forget to fill gaps with sand or small stones to prevent shifting.
With some creativity and effort, you can transform your garden space into an inviting and functional area without breaking the bank.
Mulch Trails

Creating mulch trails in your garden is a practical solution for both aesthetics and functionality. Mulch not only beautifies your space but also suppresses weeds and retains moisture in the soil. To get started, choose a natural mulch like wood chips, shredded bark, or straw for an organic look. First, outline your desired path using a garden hose or string. Then, remove any grass or weeds from the area, and lay down landscape fabric if you want added weed control. Fill the path with a thick layer of mulch, ensuring it’s evenly spread. Finally, maintain your mulch trails by adding more mulch as it breaks down over time, keeping your pathway looking fresh and enhancing your garden’s overall appeal.
Pebble Pathways
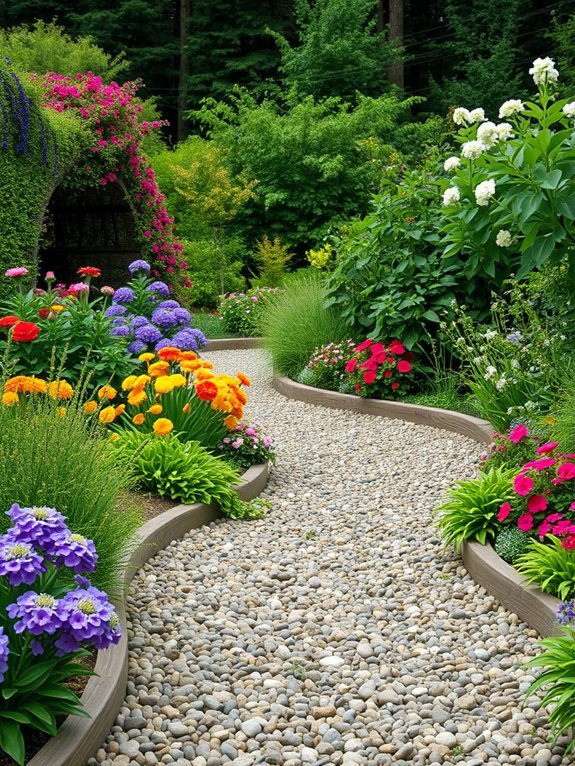
Pebble pathways offer a charming and durable way to navigate through your garden while blending seamlessly with the natural landscape. You can create a stunning walkway without breaking the bank, making it an ideal DIY project. Start by choosing a variety of pebbles that suit your style, and consider the following benefits:
- Drainage: Pebbles allow water to flow freely, reducing puddles and erosion.
- Low Maintenance: Once laid down, these pathways require minimal upkeep, saving you time.
- Versatility: You can shape and design pebble pathways in various patterns to fit your garden’s aesthetic.
Lay down a weed barrier before adding pebbles to guarantee a long-lasting and functional path. Your garden will not only look beautiful but also provide a practical route through your outdoor space.
Pallet Wood Paths

If you’re looking for an eco-friendly and budget-friendly way to enhance your garden, pallet wood paths are a fantastic option. They not only add charm but also repurpose materials that might otherwise go to waste. Start by collecting used pallets and cutting them to your desired size. Lay them out in your garden, creating a winding path that fits your landscape.
Here’s a quick look at the pros and cons of pallet wood paths:
| Pros | Cons |
|---|---|
| Sustainable materials | Requires maintenance |
| Low cost | Wood can deteriorate |
| Easy to install | Limited design options |
| Rustic aesthetic | Not ideal for wet areas |
| DIY friendly | Might attract pests |
With some creativity, your pallet path can truly stand out!
Concrete Slab Walks
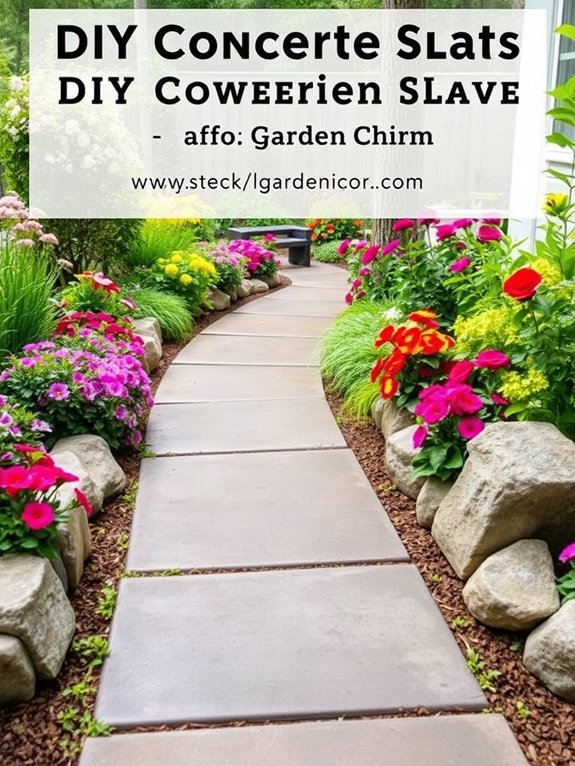
While pallet wood paths offer a rustic charm, concrete slab walks provide a sleek and modern alternative for your garden pathway. These pathways are not only durable but also require minimal maintenance, making them an ideal choice for busy homeowners. You can easily create a contemporary walkway that complements your garden’s design without breaking the bank.
Consider these key points when planning your concrete slab walk:
- Cost-Effective: Concrete is often less expensive than other materials.
- Versatility: You can customize shapes and sizes to fit your space perfectly.
- Low Maintenance: A simple wash with soap and water keeps it looking fresh.
With a little planning and some elbow grease, you’ll have a stunning garden pathway that lasts for years.
Upcycled Tire Trails
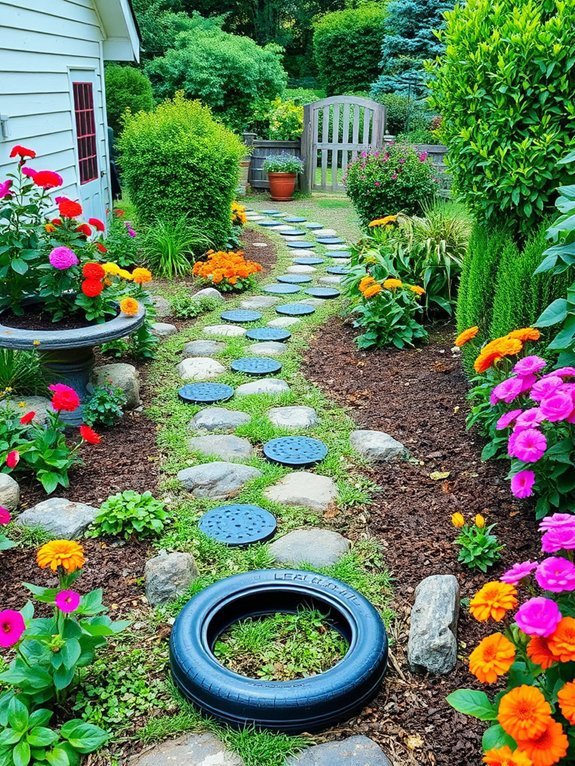
Transforming old tires into garden pathways offers a creative and eco-friendly solution that not only beautifies your outdoor space but also helps reduce waste. First, find some old tires—check local tire shops or online marketplaces. Next, clean them and cut the tires if you want a more streamlined shape. Arrange the tires in a winding pattern to guide visitors through your garden. You can fill the gaps with gravel or colorful pebbles, enhancing the look and acting as drainage. If you want to get crafty, paint the tires in vibrant colors or patterns to add a personal touch. This project not only saves money but also gives you a fun and unique pathway that stands out in your garden.
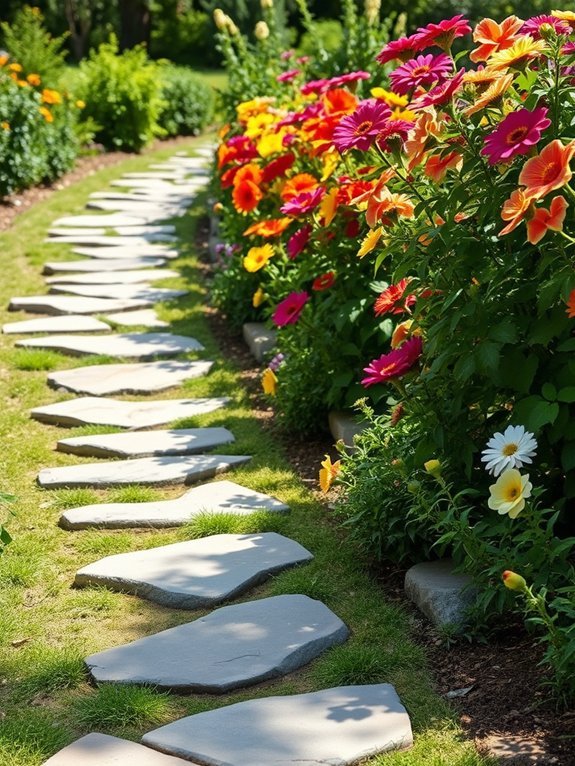
Natural Stone Pathways
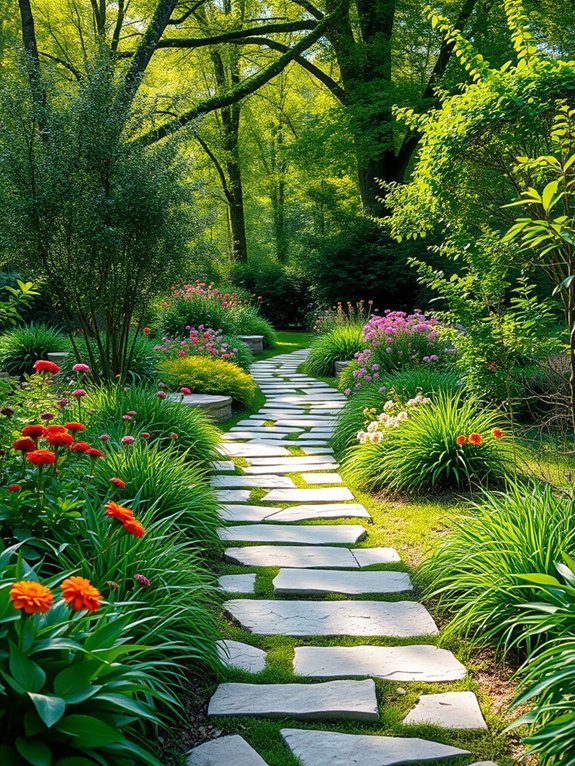
When it comes to creating a timeless and elegant garden pathway, natural stone offers an ideal blend of beauty and durability. You’ll love how these pathways not only enhance your garden’s aesthetic but also withstand the elements season after season. Plus, they’re versatile, allowing you to complement any garden style.
Consider the following benefits when opting for natural stone:
- Variety: Choose from different types, like flagstone, slate, or river rock, to suit your style.
- Low Maintenance: Natural stones require minimal upkeep, saving you time and effort.
- Eco-Friendly: They’re a sustainable choice, as they’re abundant and require less processing compared to synthetic options.
Incorporating natural stone will elevate your outdoor space beautifully!
Tile and Mosaic Pathways
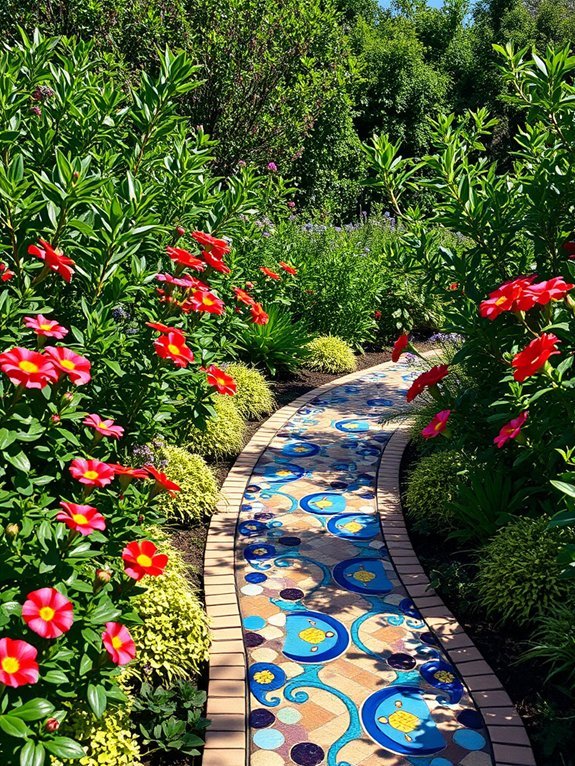
If you’re looking to add a splash of color and personality to your garden path, tile and mosaic pathways offer an exciting option. You can choose from various tiles, like ceramic, glass, or even recycled materials, to create a unique design. Start by sketching your pattern and gathering materials from local stores or online. Lay out the tiles on compacted soil or gravel, ensuring proper spacing for grout. For a simple mosaic, piece together small tiles to form a beautiful design. Once you’re happy with the arrangement, secure everything with mortar, and let it cure. Don’t forget to seal your tiles to protect them from moisture and wear. Enjoy your new, vibrant pathway that reflects your personal style!
Rope and Twine Borders
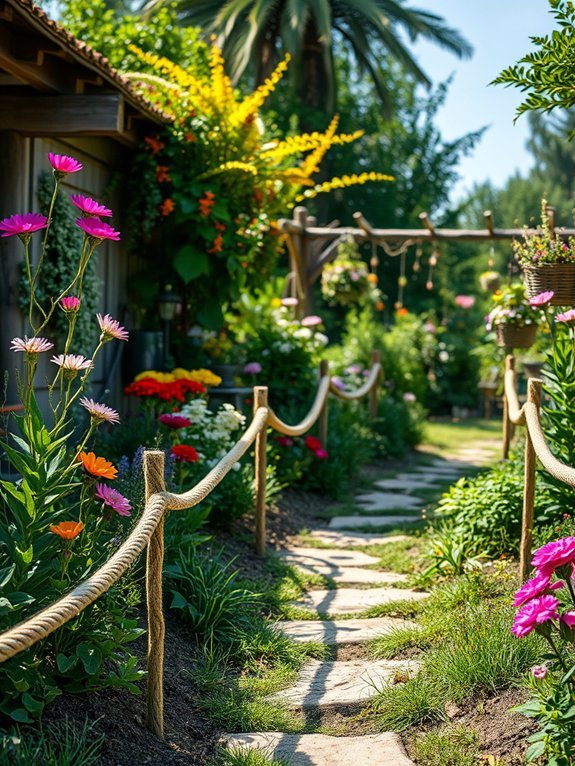
Adding rope and twine borders to your garden pathway not only enhances its visual appeal but also creates a natural and rustic charm. You’ll love how this simple upgrade gives your garden a cozy feel. Plus, it’s an affordable option!
Here’s why you should consider this DIY project:
- Easy to Install: Simply lay the rope or twine along the edges of your path for an effortless look.
- Eco-Friendly: Using natural fibers is great for the environment, blending seamlessly with your surroundings.
- Customizable: Choose from various types and colors of rope to match your garden’s style and vibe.
With a bit of creativity, your pathway will feel unique and inviting, making it a delightful space for you and your guests.
Grass and Flower Intersections

Creating charming grass and flower intersections can transform a simple garden path into a vibrant tapestry of colors and textures. By seamlessly blending grass patches with pops of flowers, you’ll not only enhance visual appeal but also create a welcoming atmosphere. Here’s a simple guide to help you design these intersections effectively:
| Flower Type | Ideal Grass Height |
|---|---|
| Marigolds | 4-6 inches |
| Petunias | 3-5 inches |
| Daisies | 5-7 inches |
Begin with low-growing flowers near the pathway and elevate with taller varieties as you move outward. This layering effect draws the eye and invites exploration. Don’t hesitate on mixing colors and shapes; it’s your garden, after all!
Step-by-Step Guide for DIY Garden Pathways
Painted Pathways
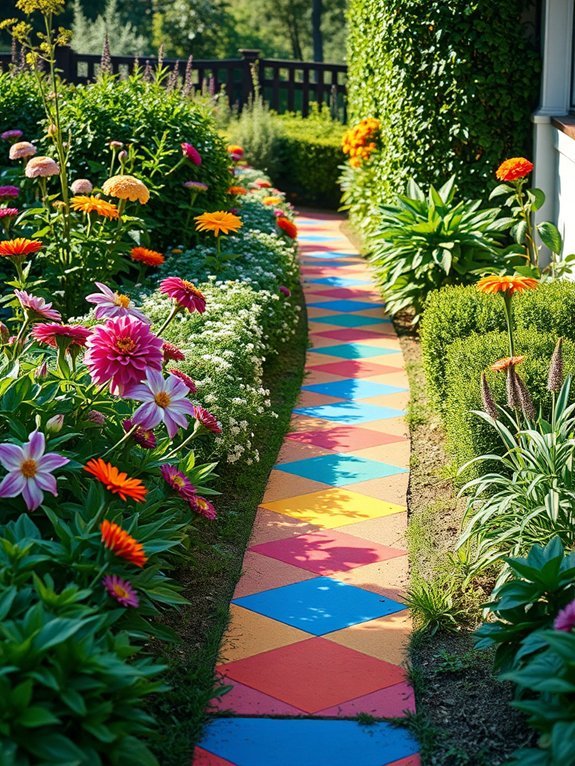
While traditional pathways can be beautiful, painted pathways offer a unique way to showcase your personality and creativity in the garden. You can easily transform an ordinary walkway with vibrant colors and patterns that reflect your style. Plus, it’s a budget-friendly DIY project!
Consider these ideas for your painted pathway:
- Stencils: Use stencils to create intricate designs or shapes, adding character to your path.
- Color Blocks: Experiment with bold color blocks to create a modern, artistic look.
- Seasonal Themes: Change it up each season with colors that match the time of year, keeping your garden fresh and inviting.
With a little paint and imagination, you can create a stunning walkway that leaves a lasting impression!
Log Slice Walks
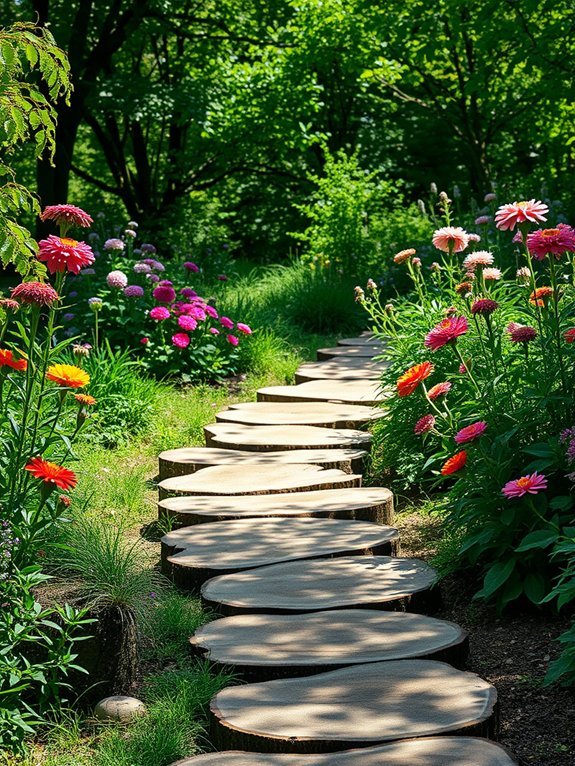
If you’re looking for a rustic touch to complement your painted pathways, log slice walks are a fantastic option. These pathways offer a natural feel that blends seamlessly with your garden. To create your log slice walk, gather some fallen tree trunks and cut them into thick slices. Arrange these slices in your desired pattern, leaving small gaps for soil or ground cover to peek through. This not only adds charm but also promotes drainage. For stability, you can set each slice slightly below ground level. If you want an added touch, consider staining or sealing the logs to enhance their color and extend their lifespan. A log slice walk can transform your garden into a inviting retreat without breaking the bank!


